


What is a UV DTF gang sheet and why does it matter
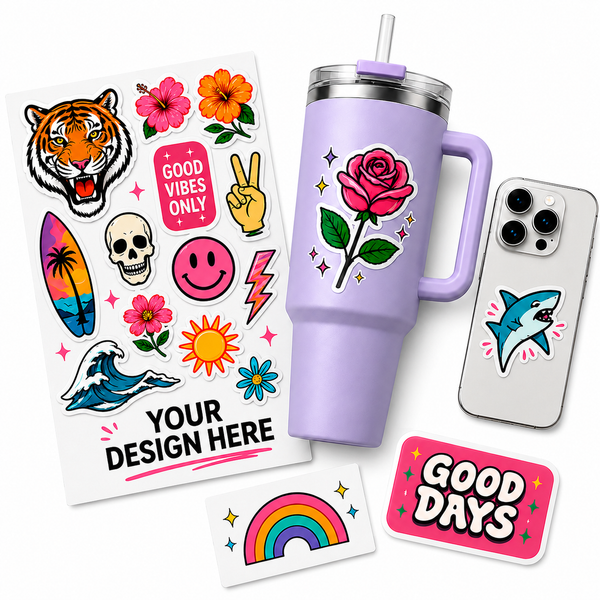
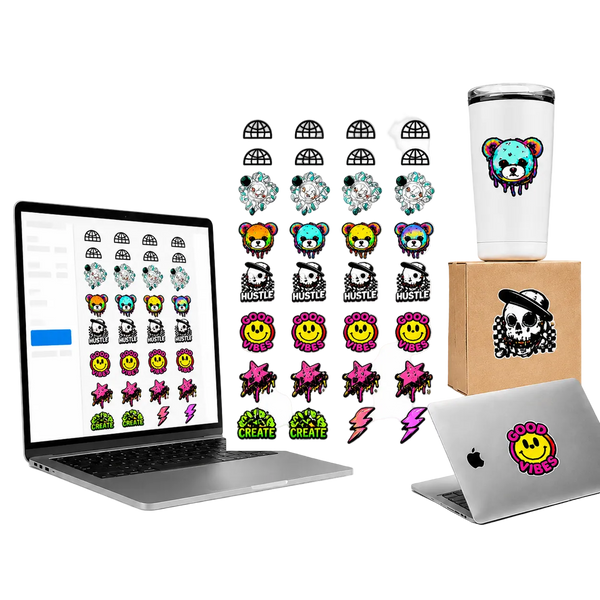
A UV DTF gang sheet is a single printed sheet that contains multiple decal designs arranged side by side, printed at once, and delivered ready to peel and apply. Instead of ordering one design at a time, you fit as many designs as possible onto one sheet and print the whole thing together. The result is a lower cost per decal, faster production, and less material waste.
UV DTF stands for UV Direct to Film. Unlike regular DTF transfers that require heat application, UV DTF decals use UV-cured ink that adheres directly to hard surfaces — glass, metal, acrylic, ceramic, plastic, wood, and more — with no heat press needed. You peel and apply. That is it.
The gang sheet format is how professional printers, custom shops, product brands, and small businesses get the most value out of every print run. If you are producing multiple designs, multiple sizes, or multiple quantities of the same decal, building a gang sheet is the most efficient way to do it.
Gang sheets are not just for large orders. Even a single small business ordering decals for product labeling benefits from the gang sheet format — it lets you mix designs, test multiple versions, and get more variety per dollar spent.
What surfaces work with UV DTF decals
One of the biggest advantages of UV DTF over standard heat transfer is the surface range. Because no heat is required, UV DTF decals work on materials that would warp, crack, or discolor under a heat press.
- Glass and glassware — tumblers, wine glasses, beer steins, jars, bottles
- Metal — stainless steel water bottles, tumblers, flasks, aluminum panels
- Acrylic and plastic — phone cases, product packaging, signage, trays
- Ceramic and porcelain — mugs, plates, tiles, decorative pieces
- Wood — cutting boards, signs, frames, coasters
- Leather and faux leather — wallets, bags, journals, accessories
- Smooth-surface plastics — laptops, water bottles, product labels, containers
The one rule: the surface needs to be smooth, hard, and relatively non-porous. Rough, textured, or highly flexible surfaces reduce adhesion. For those applications, standard DTF or sublimation is a better fit.
Step 1 — Select your gang sheet size
The first decision is sheet size. The Tawgraphix Gang Sheet Builder offers sizes from 22" × 12" up to 22" × 120". The right size depends on how many designs you have, how large they are, and how efficiently you can fill the sheet.
Start small if you are testing
If this is your first gang sheet or you are testing new designs, start with a smaller size like 22" × 12" or 22" × 24". This keeps your cost low while you verify how your designs print and apply.
Go larger for production runs
For established designs you reorder regularly, longer sheets like 22" × 60" or 22" × 120" give you the best cost per decal. The more space you fill efficiently, the lower your unit cost drops.
The builder sets your workspace automatically
Once you pick your size, the builder locks your canvas to the correct printable area. You design inside those exact dimensions so what you see is what gets printed — no guessing about margins or safe zones.
Tip on sizing: It is better to fill a smaller sheet completely than to leave large empty areas on a bigger sheet. Dead space costs money. If your designs do not fill the sheet efficiently, drop down to the next size.
Step 2 — Upload your PNG designs
UV DTF gang sheets print best from PNG files with transparent backgrounds. The transparency is critical — it tells the printer exactly where your design ends and where the blank film begins. Without it, you get a white box around every decal instead of a clean edge.
| File type | Transparent background | Best for UV DTF | Notes |
|---|---|---|---|
| PNG | Yes | Recommended | Best choice for all UV DTF decals |
| JPEG | No | Avoid | White background will print as white box |
| SVG | Yes | Good | Vector — scales perfectly at any size |
| Depends | Acceptable | Works if exported with transparency preserved |
Resolution matters too. Aim for at least 300 DPI at the final print size. A design that looks sharp on screen at 72 DPI will look noticeably soft when printed. If you are designing in Canva, Illustrator, or Photoshop, export at the highest resolution available.
You can upload multiple files at once. The builder accepts them all and places them on the canvas so you can start arranging immediately.
Step 3 — Arrange and preview your layout
This is where you get the most value out of the gang sheet format. The goal is to fill the canvas as completely as possible without designs overlapping. Every blank area you leave is wasted print space you already paid for.
Resize designs to match your actual application size
Scale each design to the exact size you plan to apply it. A decal that looks fine at 4 inches may look different at 1.5 inches — check readability at the intended size before finalizing.
Rotate designs to fill gaps
Rotating designs 90 degrees or fitting narrow designs between larger ones can significantly increase how much usable space you reclaim. Think of it like packing a box — you want everything fitting tightly.
Duplicate high-volume designs
If you know you will need 20 of the same decal, duplicate it and fill rows. You get consistent prints and maximize quantity in a single order rather than reordering the same thing repeatedly.
Use the live preview to spot issues
The preview updates in real time as you arrange. Check that designs are not overlapping, no important elements are cut off at the edges, and the overall layout looks intentional rather than scattered.
Leave a small gap between designs. A 2–3mm gap between each decal gives the cutter clean separation and ensures you get individual decals with clean edges rather than designs that bleed into each other.
Step 4 — Confirm your sheet size before ordering
Before you hit checkout, do a final check on sheet size. Once your layout is complete, the actual space used may be different from what you initially estimated. If your designs only fill half a large sheet, consider downsizing. If they are packed tightly with no room left, you might benefit from going one size up to add a few more designs.
The builder makes this easy — change the size and the canvas adjusts automatically. Your designs stay where they are, and you can see immediately whether they still fit within the new dimensions.
This final size check is one of the most overlooked steps and one of the most impactful for cost efficiency. A few seconds of review can save you money on every order.
Step 5 — Add to cart and place your order
Once the layout looks right and the size is confirmed, click Add to Cart and complete checkout. Tawgraphix prints your gang sheet with premium UV inks, cuts it precisely, and ships it fast — ready to peel and apply directly to your products.
Every sheet is reviewed for quality before it ships. Sharp color, clean edges, and consistent detail across the entire sheet are the baseline standard. If something does not meet that standard, it does not ship.
Pro tips for getting the most out of every gang sheet
After building dozens of gang sheets, these are the habits that separate people who get great results consistently from people who have to reorder because something went wrong.
- Always work from your highest resolution source file. Do not resize a low-res PNG and hope it sharpens up. It will not. Find or recreate the design at full resolution before uploading.
- Check transparency before uploading. Open your PNG in a browser or image viewer and confirm the background is transparent (checkerboard pattern), not white. A white background will print as a white box around your decal.
- Group similar sizes together. Arranging designs by size makes the layout faster and usually results in denser packing than mixing large and small designs randomly.
- Order a test sheet before scaling up. If you are printing a new design for the first time, order one smaller sheet to verify color accuracy and adhesion on your specific surface before committing to a large run.
- Clean the application surface. UV DTF adhesion drops significantly on dusty, oily, or wet surfaces. Wipe with isopropyl alcohol before applying and press firmly with a squeegee for the best bond.
- Store unused decals properly. Keep unapplied UV DTF sheets flat, in a cool, dry location, away from direct sunlight. Proper storage keeps adhesion strong until you are ready to apply.
Who uses UV DTF gang sheets
The short answer is anyone who needs to put a design on a hard surface without a heat press. The longer answer covers a surprisingly wide range of people and businesses.
Small product-based businesses
Candle makers, soap brands, skincare companies, and food producers use UV DTF decals for product labeling and branding on glass and plastic containers. No need for custom label printing minimums — order exactly what you need.
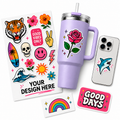
Custom drinkware and gift businesses
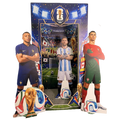
Tumblers, wine glasses, and mugs are among the most popular UV DTF applications. Gang sheets let businesses print full menus of designs in one run rather than ordering each design separately.
Craft sellers and market vendors
Makers who sell at farmers markets, craft fairs, and pop-up events use UV DTF gang sheets to produce high-quality custom decals for their products without investing in expensive equipment.
Corporate gifting and promotional brands
Companies ordering branded merchandise for events, client gifts, and employee recognition programs use gang sheets to get sharp, professional results on premium hard-surface products.
Print shops and resellers
Businesses that offer custom printing services to their own customers use Tawgraphix gang sheets to fulfill orders without owning UV DTF equipment. Low minimums and fast turnaround make it viable at any scale.
Frequently asked questions about UV DTF gang sheets
PNG files with transparent backgrounds are the best choice. The transparency ensures clean edges with no white box around the design. Always export at 300 DPI or higher for the sharpest print quality.
Regular DTF transfers require a heat press and are designed for fabric and apparel. UV DTF uses UV-cured ink and applies to hard surfaces like glass, metal, ceramic, acrylic, and plastic with no heat required — just peel and press.
Yes. You can mix large and small designs, duplicate the same design multiple times, rotate elements to fill gaps, and arrange everything freely. The goal is to fill the sheet as efficiently as possible to lower your cost per decal.
UV DTF decals are highly durable on hard surfaces when applied correctly. They resist scratching, fading, and moisture well. For best longevity, apply to a clean surface, press firmly, and avoid submerging in water for extended periods.
Clean the surface with isopropyl alcohol and let it dry completely. Peel the decal from the backing film, position it on the surface, and press firmly with a squeegee or your fingers from the center outward. No heat required.
The Tawgraphix Gang Sheet Builder offers sizes from 22" × 12" up to 22" × 120". You select your size first and the builder sets your canvas to match. If your designs fill less than the sheet after layout, you can downsize before ordering.
UV DTF decals work on gently curved surfaces like tumblers and bottles. For tighter curves, apply slowly from one edge and smooth outward to minimize bubbling. Very sharp curves or irregular shapes may need smaller individual decals rather than large wraps.
Tawgraphix prints and ships UV DTF gang sheets quickly. Every order ships with tracking so you know exactly when it arrives. For time-sensitive orders, check the current production times at checkout.