


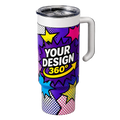


A wrap-around tumbler design is artwork that covers the full or partial circumference of a tumbler — the design flows continuously around the body of the cup rather than sitting as a small centered logo. Done right, it looks intentional, polished, and premium. Done without a proper template, it prints crooked, gets cut off at the seam, or stretches in ways that make a clean design look warped.
The challenge is that tumblers aren't flat. They're cylinders — some with a slight taper, some straight-walled — and your design file has to account for the exact dimensions of the tumbler you're printing on. That means working from a template, not guessing. Every tumbler style has a specific printable height, a specific wrap width, and a seam line where the design starts and ends. Miss any of those and the print won't match what you built on screen.
This guide walks through the full process: getting the right template, setting up your file correctly, placing artwork, and preparing the final export. Whether you're designing for custom drinkware through Tawgraphix or building artwork to send to any print supplier, the process is the same.
Never design a tumbler wrap freehand without a template. Even being a few millimeters off on the width or height will cause misalignment, cropping, or a seam that doesn't close cleanly.
Step One: Get the Right Template for Your Tumbler
Templates are specific to tumbler model and size — a 20oz straight-wall template is not the same as a 20oz tapered tumbler template, and neither matches a 30oz. Before you open a design program, identify exactly which tumbler you're designing for. If you're ordering through Tawgraphix, the custom tumbler designer provides the template dimensions for each available tumbler so you're working with the correct measurements from the start.
If you're sourcing your own blanks, get the template from your blank supplier — not from a generic source online. Templates from third parties are often approximate and don't account for manufacturer-specific taper angles or seam placement. An inch of difference in wrap width means your design either won't complete the wrap or will overlap awkwardly at the seam.
A proper template file includes the printable area (the safe zone for your design), the bleed area (extra content that extends beyond the edge in case of slight shift during printing), the seam line, and guides for the top and bottom edge of the printable area. Download it as an editable file — PSD, AI, or a PDF with layers — so you can design inside the guides rather than trying to match dimensions manually.
Identify your exact tumbler model and size
Straight-wall vs. tapered matters. 20oz vs. 30oz matters. Get the specific model name or dimensions from your supplier before looking for a template.
Download the template from your print supplier
Use the template provided by whoever is printing the tumbler — not a generic one from a Google search. Supplier templates are sized to their specific blanks and printing setup.
Open the template in your design program
Adobe Illustrator, Photoshop, Canva, and Affinity Designer all work. Make sure you open the template at 100% scale — do not resize the canvas or the guides will no longer be accurate.
File Setup: Resolution, Color Mode, and Canvas Size
Tumbler wrap files need to be set up correctly before you add a single design element. Getting this wrong at the start means rebuilding everything later.
Resolution: Set your file to 300 DPI minimum. This is the standard for print — anything lower will look sharp on screen but pixelated in the final print. If your design includes photos or detailed illustrations, 300 DPI is the floor, not a suggestion. Vector artwork (logos built in Illustrator, for example) is resolution-independent, but any raster element in the file — textures, photos, gradients exported as images — needs to be 300 DPI at the final print size.
Color mode: Set the file to CMYK, not RGB. Screens display in RGB, which includes colors that CMYK printers cannot reproduce. Designing in RGB and converting at export often causes color shifts — blues go purple, vibrant oranges dull down. If your brand has specific colors, get the CMYK values and set them manually rather than relying on a conversion.
Canvas size: Do not change the canvas size from the template. The template dimensions are the print dimensions. Design within the guides — keep important elements inside the safe zone, extend backgrounds and non-critical elements into the bleed area.
If you're designing in Canva, export as a PNG at the highest resolution available and confirm the pixel dimensions match the template before submitting. Canva works in RGB — mention this to your print supplier so they can handle the color conversion accurately.
Understanding the Template Zones
Every tumbler template divides the printable area into zones. Knowing what each zone means prevents the most common design mistakes.
Safe Zone
The inner boundary of the template. Keep all text, logos, and critical design elements inside this area. Anything outside the safe zone risks being cut off or sitting too close to the edge after wrapping.
Print Area
The full printable area, including the bleed. Backgrounds, patterns, and non-critical design elements should extend to this boundary so there are no white edges if the print shifts slightly during application.
Bleed Area
The zone beyond the print area that gets trimmed or hidden at the seam and edges. Always extend your background color or pattern into the bleed — never leave it white unless your design intentionally has a white border.
Seam Line
The vertical line where the left and right edges of the wrap meet on the tumbler. Design your wrap so that the seam falls in a visually clean spot — a solid color, a background area, or a natural break in the pattern. Never put a logo or important element across the seam line.
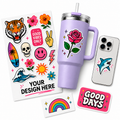
Designing the Artwork: Layout, Typography, and Pattern Placement
With the file set up correctly, the design work can begin. Wrap-around tumblers reward designs that use the full canvas — patterns, landscapes, and flowing artwork look intentional on a wrap in a way they don't on a standard label. But the cylinder format has quirks that flat design doesn't.
Text placement: Keep text horizontal and inside the safe zone. Text that runs too close to the top or bottom edge can be obscured by the lid or base. Text near the seam should either be fully clear of it on both sides or end well before it — text that splits across a seam is readable in the flat file but looks broken on the finished tumbler.
Patterns and repeating elements: If your design uses a repeating pattern — florals, geometric shapes, confetti — make sure the pattern tiles seamlessly at the seam. The left edge of your design needs to flow into the right edge without a visible gap or repeat break. Most design programs let you offset and mirror tile patterns for this purpose.
Focal point placement: The natural focal point of a tumbler is the front face — roughly the center third of the wrap. Place your logo, main graphic, or key text element there. Supporting elements, patterns, and backgrounds can extend around the rest of the wrap. This way the tumbler reads clearly when someone picks it up normally, and the design rewards a full rotation.
Dark tumblers: If you're printing on a dark powder-coated tumbler using UV DTF transfers, your design file needs a white ink base layer for colors to show correctly. Most UV DTF suppliers handle this automatically, but confirm before submitting — a full-color design sent without a white base to a dark tumbler will look translucent or washed out. The UV DTF gang sheet builder handles white base layers automatically for designs going onto dark surfaces.
Common Wrap Design Mistakes and How to Avoid Them
- Using the wrong template size — always confirm the exact tumbler model before downloading a template
- Designing at 72 DPI (screen resolution) instead of 300 DPI — everything looks fine until it prints blurry
- Placing a logo or critical text directly on the seam line — it will split in half on the finished tumbler
- Not extending the background into the bleed — leaving white edges that appear as a gap at the seam or along the top and bottom edge
- Designing in RGB and expecting the printed colors to match exactly — convert to CMYK before submitting
- Putting text too close to the top or bottom edge — lids and bases can cover more than you expect
- Not previewing how the design wraps — use a 3D mockup or wrap the flat file around a cylinder shape in your design program before submitting
Exporting Your File for Print
When the design is finished and reviewed, export it correctly. The wrong file format or export settings can undo a well-built design.
For UV DTF transfers, a high-resolution PNG with a transparent background is the standard format. Transparency matters — it tells the printer where the design ends and the tumbler surface begins. If your design has a solid background that covers the full wrap, a transparent background isn't strictly necessary, but it's still good practice. Export at the full template resolution, not scaled down.
For sublimation, PDF or high-resolution JPEG are common accepted formats. Check with your specific supplier — some require flattened files, others prefer layered PDFs. Always keep your working file with layers intact so you can go back and adjust without rebuilding.
Before submitting, do a final check: confirm the pixel dimensions match the template, confirm the file is 300 DPI, and zoom into the design at 100% to check that text is sharp and no elements are accidentally outside the safe zone.
Design Software Options for Tumbler Wraps
| Software | Best For | Template Compatible | 300 DPI Support | CMYK Support | Cost |
|---|---|---|---|---|---|
| Adobe Illustrator | Vector logos, clean layouts | Yes | Yes | Yes | Subscription |
| Adobe Photoshop | Photo-based and textured designs | Yes | Yes | Yes | Subscription |
| Affinity Designer | Vector and raster, budget-friendly | Yes | Yes | Yes | One-time purchase |
| Canva | Quick designs, non-designers | Partial | Limited | No (RGB only) | Free / Pro |
| Procreate | Hand-drawn and illustrated wraps | Partial | Yes | No | One-time purchase |
Frequently Asked Questions
It depends on your specific tumbler model. A standard 30oz straight-wall tumbler wrap is typically around 8.5" wide by 3.75" tall, but this varies by manufacturer. Always use the template provided by your print supplier and design to those exact dimensions — do not estimate or use generic dimensions from a web search.
Yes, with caveats. Canva works in RGB, not CMYK, which can cause color shifts in the final print. It also has limited resolution control. If you're using Canva, set the canvas to the exact pixel dimensions of your template, design at the highest resolution Canva allows, and export as PNG. Let your print supplier know the file is from Canva so they can handle the color profile conversion. For precise color matching or professional-grade output, Adobe Illustrator or Affinity Designer are more reliable tools.
A full wrap covers the entire circumference of the tumbler — 360 degrees — with the design meeting itself at the seam. A partial wrap covers roughly half to three-quarters of the tumbler, leaving part of the surface bare. Partial wraps are easier to apply (especially with UV DTF transfers on curved surfaces) and still look complete from the front. Full wraps require more precision at the seam and are better suited for seamless patterns or backgrounds where the join point is in a non-critical area.
The left and right edges of your wrap file need to be mirror images at the seam point. In Illustrator, you can use the Offset Path tool or manually align elements so what exits the right edge enters from the left edge seamlessly. A simpler approach is to design the pattern so the seam falls in a solid color area or a natural visual break — that way even a slight misalignment at the seam isn't noticeable.
Yes. Tapered tumblers — those that are wider at the top than the base — have a trapezoidal printable area, not a rectangle. A design built on a straight-wall rectangle template will distort on a tapered tumbler. Always confirm whether your tumbler is straight-wall or tapered and use the correct template. This is one of the most common mistakes when designers switch between tumbler styles without checking the blank specifications.
For UV DTF transfers, a high-resolution PNG with a transparent background is standard. For sublimation, high-resolution PDF or flattened JPEG at 300 DPI is typically accepted. Always check your supplier's specific requirements — some have preferred formats or file naming conventions. Submit at the full print size, not scaled down, and keep your layered working file until the order is confirmed correct.
The custom tumbler designer provides the correct dimensions and template guides for each tumbler available through Tawgraphix. Start there to make sure your file is sized exactly right before you build your design. If you have questions about a specific tumbler model's dimensions, reach out before designing — it's much easier to fix a setup issue before the artwork is built than after.


